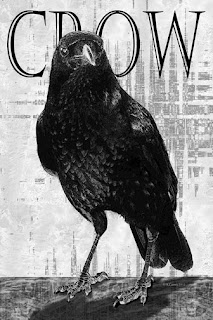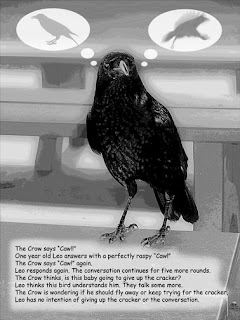
Crows are in right now. I'm not sure why. But they are fun to play with. I photographed this crow on a table in the Everglades (see original photo below). He was carrying on quite a conversation with my one year old grandson Leo. Leo has a comedic grunting language all his own that sounded exactly like the crow. He and the crow seemed to be communicating, although Leo never let loose the cracker that the crow was requesting.
This photo was so easy to work with, I thought it might make a fun tutorial for anyone wanting to play with digital like I do. If you have Photoshop and are familiar with it, the following instructions provide a tutorial on making the above image. I'll repeat this in Elements soon and write that up. And Qiang's workshop gave me the idea to repeat the same exercise in Gimp. (Progress will be reported on that also at a later date.)
- Grab the starting photo below. (Right click on it and choose Copy Image or Save Image As.)
- In Photoshop use the Magnetic Lasso tool to select just the crow from the color image and click Copy (Control C).
- Paste (Control V) him into a new blank image window sized 8x12 inches and 300 dpi.
- Clean up around any edges with the Eraser tool if necessary.
- Choose Image>Adjustments>Black and White and slide almost all of the color sliders to the far right. You'll know if it improves the contrast by watching the lights and darks in the image.
- Choose Image>Adjustments>Desaturate. This will take all the color out. If you want to adjust light and dark some more, try playing with the sliders under Image>Adjustment>Levels.
- Now comes the part I like, playing with filters. You can choose any you like. With your Crow layer selected, choose Filter>Filter Gallery. I applied the Cross Hatch filter and then added Poster Edges on top of that. I'd give you the exact numbers, but I don't know them, I just watch the window and play until I like it.
- Right now the background is just white. I added a new layer, filled it with Gray and added a pattern to it using the Add a Layer Style icon at the bottom of the Layers palette. You can add one of your own patterns or one of the millions available on the net.
- Next, add a new layer beneath this one. Leave it blank. Make the above layer active and choose Merge Down. Why? So you can add another pattern! That's the fun part. Use a different blend mode to combine the two.
- Add a new layer and add a "table" for the bird to sit on. First draw a rectangle with the Rectangular selection tool. Choose a neutral gray as the foreground color and fill it with the neutral gray by clicking the Alt plus Backspace keys.
- Add patterns to it just as you did the background.
- Type the word Crow or any other word and choose a font. This is Castellar at about 250 points.
- Now add a layer between your crow and the table and with a soft black brush paint in some shadows. You can then make the layer as transparent as you want by adjusting the Opacity slider on the Layers Palette.
- To refine the bird, add a new layer above it and use a white brush and draw a few highlights around the eyes and beak.
- For fun, add a layer beneath the bird and paint some feathers poking here and there.

Of course, you don't have to do what I did with it, you can just have fun with the crow image. For example, below I turned the same image into a memory for a scrapbook page for Leo.


Seems even though I uploaded the high res photo, Blogger takes it upon itself to downsize. So, my original image of the crow will be so small once you copy it that it may not be suitable for experimenting with. If anyone wants the original, let me know. I'll be glad to email it.
ReplyDeleteGreat posting Kathy and a fun excercise. I think you are going to pull us into the digital age after all.
ReplyDelete