by Kathy Garvey
YouTube is a veritable feast of new ideas and tutorials. I
watched about 20 on the technique of acrylic pouring recently and decided to
give it a try.
I gathered canvas, cheap acrylics in primary colors of magenta, cyan and
yellow, some glazing medium (which I hoped would work as pouring medium since I couldn't find that), white and black acrylics, paper
cups, a drying rack, various cheap tools for stirring and scraping, and ordered
silicone online.
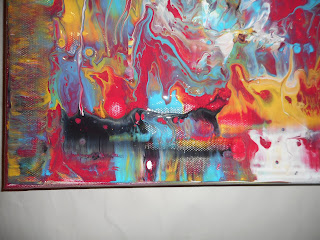
After mixing what I hoped was the right consistency of everything, I drizzled my primary colors randomly on the canvas, put white and
black at either end and made a pitiful attempt to pull the end colors over the
others and create "cells." Below is my crazy result.
It obviously takes experience to know how to not overdo this technique. And, now I need to wait a few days for it to dry and see
if I can do anything with this 12x12 canvas. But this isn't a sad story about my pouring results.
I saw little sections of it that I liked, so I took photos.
And then I took the first of those photos into Photoshop.
After experimenting with several of my seamless custom patterns as overlays, I used one created for a recent Matisse contest at Spoonflower in Soft Light mode. That was the one! After more experimenting and filtering I
liked the results (shown below) enough to consider printing it to fabric sometime in the future. It would make a wild outfit, or pillows, or sections for a crazy quilt!
So whether I end up with a great "poured" canvas
or not, I'm happy with all of the secondary results - future fabrics, cards, prints and posters. And, I still have numerous photos from my first pour to "play" with.
If you are interested in trying acrylic "pouring" I recommend videos by Caren Goodrich on YouTube. They're some of my favorite and she makes the preparation and instructions very clear.


No comments:
Post a Comment